|
9. The Deployment Area
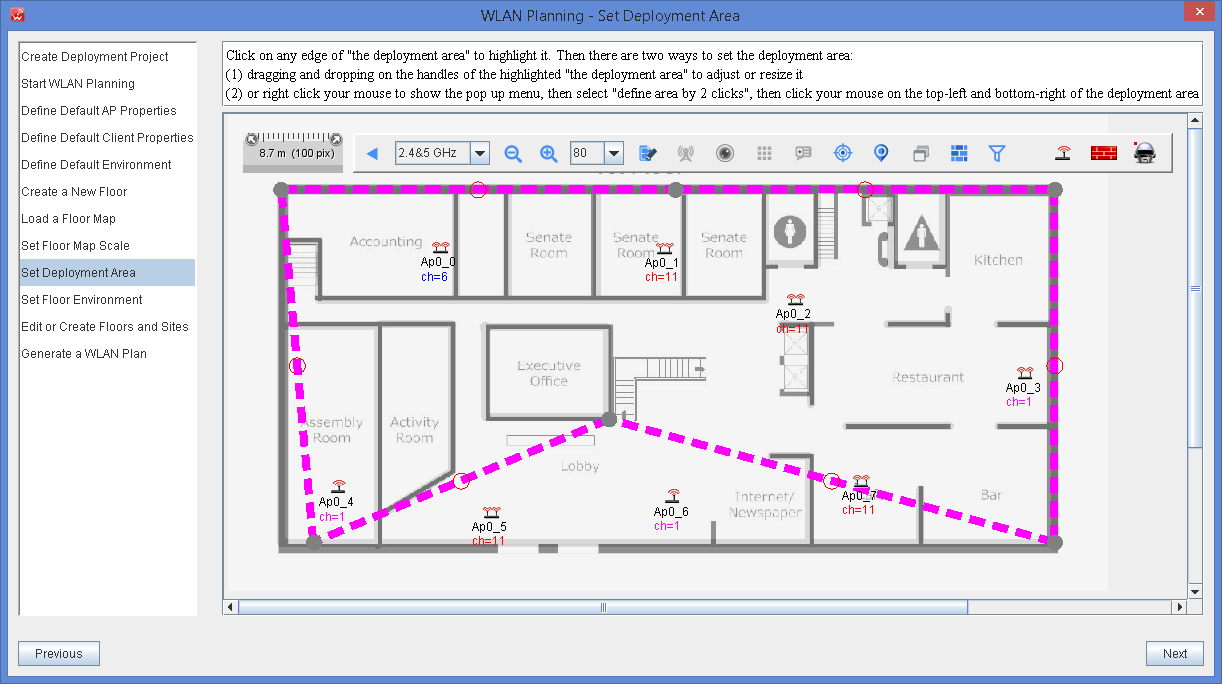
When you click the Set Deployment Area button of the Auto Planning menu, you will be presented with your floor plan (shown above), which is a dotted line representing the area within which APs will be placed. Right clicking on the deployment are will open a pop up that will allow you to set the area with two clicks.
If the line doesn't surround the area that you wish, there are buttons at the four corners and halfway between the corner buttons. You can drag those buttons wherever you wish to resize the box. The box will not be seen until you release the mouse button with which you drag. Drag with the left mouse button. When you're satisfied, click the Next button.
|