|

Hide and show deployment tool bar
 and and 
Users can hide or show deployment tool bar by clicking the left side arrow icon, the deployment tool bar shrinks to a small right arrow icon, and clicking the right arrow icon to show the whole bar icons.
Zoom Floor Map
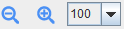
The Zoom bar can be enabled by checking this box allowing the user to expand or contract the view of the floor plan.
Deployment Area
 
The Area is displayed as a dotted line surrounding the area within which the WLAN traffic will be optimized. Handles are provided at the corners and mid-lines to facilitate resizing the area.
Heat map
 
The Heatmap displays a color coded gradient map of radiated energy in the deployment area. A scale is provided to give a relative RSSI or Signal in dBm, Rate or Throughput in Mbps or QoS Score. The heat map can be viewed by either select APs, all APs or client.
Coverage Holes
 
Check on it will show the coverage holes on the deployment plan in red.
Grids
 
A Grid can be placed on top of the floor plan by checking this box.
RSSI
 
When checked, this box displays the received energy in dBm (blue numbers) for all of the APs surrounding a transmitting AP. This transmitting AP turns solid pink when it is selected by left clicking.
Circles
 
When checked, this box plots concentric circles surrounding the selected AP. The pink circle is at the data sensitivity level (typically -68 dBm). The blue circle is at the CCA or sensitivity level (typically -84 dBm).
Map
 
Check on it will show the floor map on the deployment plan.
Shadow APs
 
Check on it will show the APs on other floors but may be "heard" by the APs or clients on the current floor.
Walls
 
Check on it will show the walls on the current floor.
Add AP

An AP can be added to the deployment by clicking and dragging this icon onto the deployment area. Thereafter, its characteristics can be modified by right clicking the AP and changing the appropriate values.
Add Wall
.png)
A Wall can be added to the deployment by clicking and dragging this icon onto the deployment area. You can change its orientation and shape by use of the handles on its ends and midpoint. The open circle handles are used to split the straight segments of the wall into multiple lines.
SSR

Drag and drop the Site Survey Robot (SSR) robot icon to any location of the floor allows one to perform virtual site survey. In addition to moving the SSR around by hovering the mouse over it, a tool-tip will display showing the detailed stats of that particular location from a client's perspective.
Settings
.jpg)
A number of settings are made available including:
Define Environment Types
Define AP Radio Types
Define Client Radio Types
Define Wall Types
Define Interference Types
Define Optimization Goals
Define Underperformance
Install Local Copy
Set File for User Defined Types
Select Metrics (meters or feet)
Email Server Settings
Email Notification Settings
Manage License
Show Start Page
Starting Welcome Page
.jpg)
Use this option to go back to the starting Welcome Page
On-line User Manual

If you are stuck at any point, use this button to launch the on-line user manual.
Detach the current window to a frame

Use this option to view the current window in a new frame. You will be provided with more options there.
|